1. After
transcoding the picture clips, import them into your Final Cut project.
Make sure all audio files are 48kHz AIFF files and import them into the
project.
2. Make sure "audio scrubbing" is on (toggles on and off with "Shift S.") Put the cursor
on
the exact audio frame where the hand clap for the take closes (use the
right and left arrows to navigate to the exact frame). Refer to the
audio meters on the lower right to make sure you have the correct frame.
Single click on the clip in the timeline to highlight it. Use the "m"
key to place a marker on that frame.
3. Drag
the first picture clip to be put into sync from the browser to the
timeline. Put the cursor on the exact frame where the hand clap closes.
Click on the clip in the timeline to highlight it. Use the "m" key to
place a marker on that frame.
4. Line
up the markers you have placed on the picture and sound clips. Expand
the timeline view (command plus) to make sure that the two markers are
actually lined up, then reduce the timeline view (command minus) Using
the razor tool (command b), cut the sound clip to the exact length of
the picture clip. The "snap to" function (toggles on and off with
lower-case n) will make it easier to line up the cursor (the CTI) with
the beginning and end points of the picture clip so you can cut the
sound clip in the correct place. Highlight both the picture and sound
clips. Link the clips by hitting "Command L," or Modify>Link. The
clips are now in sync.
5.
When you're syncing double-system material that has a single-system
scratch track (for example, when shooting with a DSLR), you don't really
need a slate, though it can make syncing faster. Just expand the
vertical height of the track to make the waveform more visible and line
up the waveform of the double-system track with the waveform of the
single-system scratch track. Play the track. If it sounds "reverb-y,"
it's not quite in sync. Use the open or close bracket on the keyboard to
nudge the double-system track right or left one frame until it's in
sync. Be sure to remove the scratch track from the timeline before
linking the picture and audio clips.
Thursday, December 11, 2014
Tuesday, December 9, 2014
BLOG POST 4- Due Dec. 18
Sound-Image and Image-image Relationships
For this assignment, you will take a scene or sequence of an edited film (fiction, experimental or documentary), and examine the way it is constructed. Pick an example where you think the editing has made a significant contribution to the storytelling and the feel of the piece. What is the relationship of the sounds to the images? Of the images to one another? How are the shots organized in terms of their content, composition, color, movement, etc.? What determines how long the shots are and what order they are placed in? It there a “right” place to cut or not to cut? Are the cuts seamless or obvious? Is the rhythm smooth or balky?
Once you have a sense of what is happening with the editing of the sequence, explain how this approach connects with and supports the overall goals of the film and its makers.
You should choose a short piece of media (2-3 minutes max) you can watch several times. The scene you pick should be available online so that your section leader can look at it as well. Please provide a link in your blog to the media.
250 Words
Due Dec. 18 at noon- FIRM
Thursday, December 4, 2014
Take 2: Transcoding for High Def
- TRANSCODE .MTS FILES INTO A .MOV FILE WITH ADOBE MEDIA ENCODER AND MPEG Streamclip
[High Definition Workflow]
- Open the program Media Encoder in the Applications folder.
- In Media Encoder, go to Preferences. In the General section, look under Output. Click on the “browse” button next to “specify output file destination” and select the folder that you just made in your External Hard Drive called MOV.
- From the MTS folder, drag the .MTS files and drop them into the Queue in Adobe Media Encoder. The Queue is the large window on the left.
- Uncheck the little box titled: “Auto encode watch folders” at the top.
- Click on the Triangle button under Format to pull up the drop down menu of formats. Choose Quicktime.
- Click on the Triangle Button under Preset to pull up the drop down menu of presets -----> If you shot 30fps, choose:

------> If you shot 24fps, choose:

- Press the green play button to begin converting.
- Now each .mts file should become an .mov file with the same name, in the folder called “MOV”. Close Adobe Media Encoder.
- In your VIDEO Folder (in your external drive) create a new folder and call it “PRO-RES”.
- Open the program MPEG Streamclip in the Applications folder.
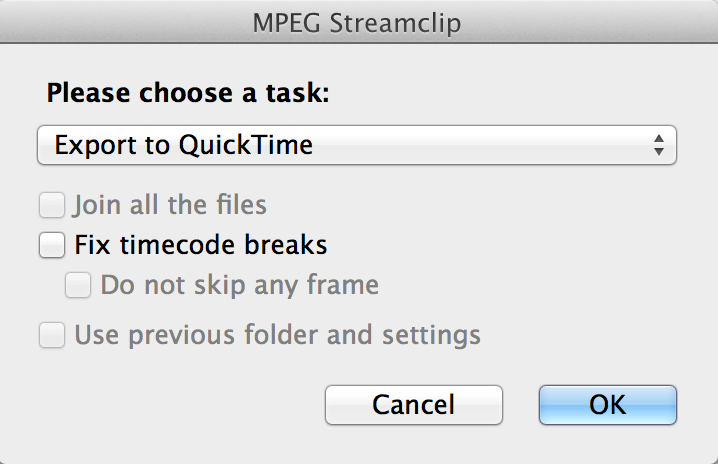
- In MPEG Streamclip, go to List > Batch List:
- Go to Add Files and select your .mov files in your MOV folder. Then click To Batch.
- A window will open. Select OK:

- In the new window, select the folder that you just made in your External Hard Drive called “PRO RES”.
- Now, at the top of the window, in the Compression category, choose the Apple Pro Res setting from the pop-up menu:
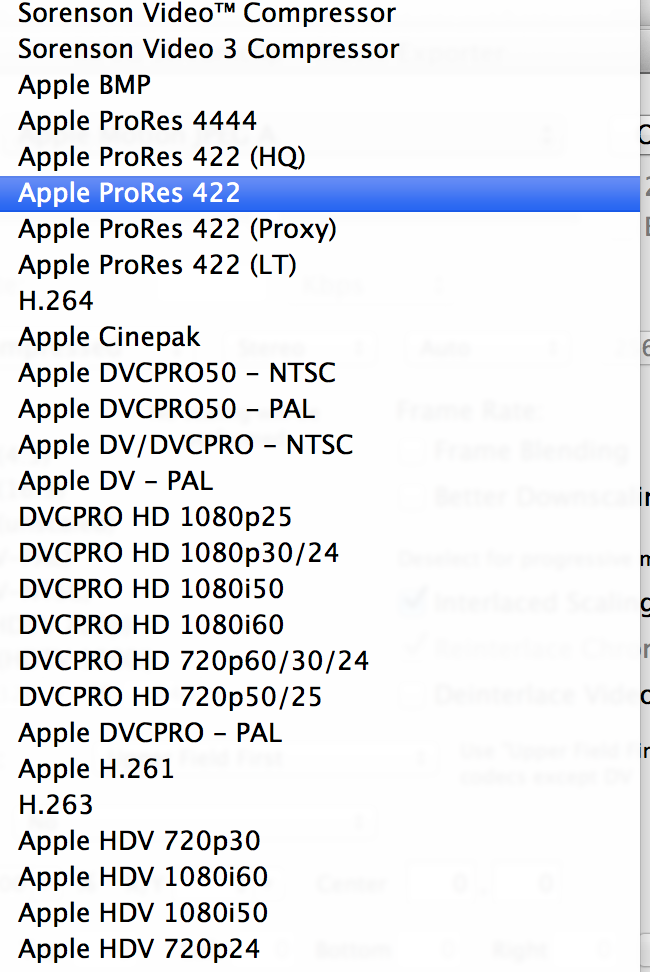
- And set everything like this:

Note: At Frame Rate, type 29.97 if you shot 30fps; 23.98 if you shot 24fps.
After The batch, your files (In the “PRO RES” folder) are ready to be imported into Final Cut Express.
Subscribe to:
Posts (Atom)