SONY Alpha 3000 Manual
FILMP/MEDP 150/160 • M. Lucas
The Sony Alpha 3000 looks like a DSLR, but it actually is closer to a video camera in an SLR body, AKA a “mirrorless” camera. It records a 20MB still image (5456 x 3632 pixels!) and can be set for JPEG or RAW + JPEG.
The camera comes with a battery, a charger, a lens cap, a lens hood and a shoulder strap. The lens has a UV filter, which can be cleaned without damaging the lens. There are two kinds of chargers, one where you plug in the camera, and the other where you just put the battery in the charger, a better idea. The batteries should last through more than one day of shooting. But they should be charged at least once a week.
The camera stores images on an SD card, which is in a slot as shown. Be careful with the door covering the card. The card removes by pushing it in, and springing it out.
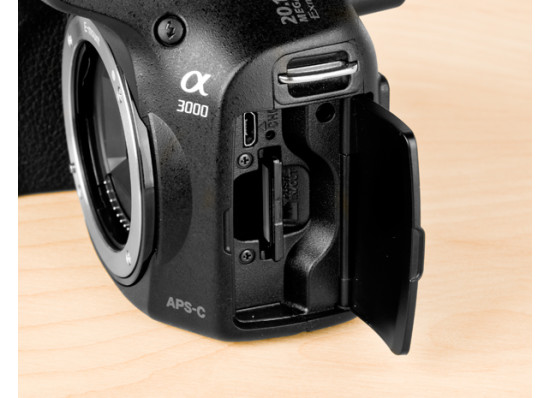
Side door for SD card and charger.
Using the Camera
The viewfinder is electronic, giving you the same image you see on the back viewscreen. There is a button on the top right to switch between the two ways of viewing next to the Mode Wheel. (see below) The viewfinder is good for situations that are too bright for the rear screen, but not great for critical viewing.
The lens is interchangeable. It is an E-mount lens, which is a new Sony mount. So adaptors are needed for other lenses like Canon or Nikon.
The lens feels like it should be a manual focus lens, but it is not. (The ‘focus’ ring seems to be a dummy.) The only manual adjustment is for focal length, from 18-55mm. It is also not a fast lens, maxing out at f3.5 on the wide, and f5.6 on the telephoto end.
While there is no manual focus, there are easy adjustments with the control wheel for both f-stop, and for shutter speed.
The sensor is a standard APS-C 23mm sensor, similar to that on a Canon 7D. This means the camera can give a 'film look' depth of field under the right circumstances.

Shooting and Controlling Exposure
Setting focus. There is no real manual focus control with the standard lens. To focus, you need to hold the shutter button part-way down, and the camera will focus based on a grid (you'll see little green markers). If you let go of the button, the camera will keep that focus.
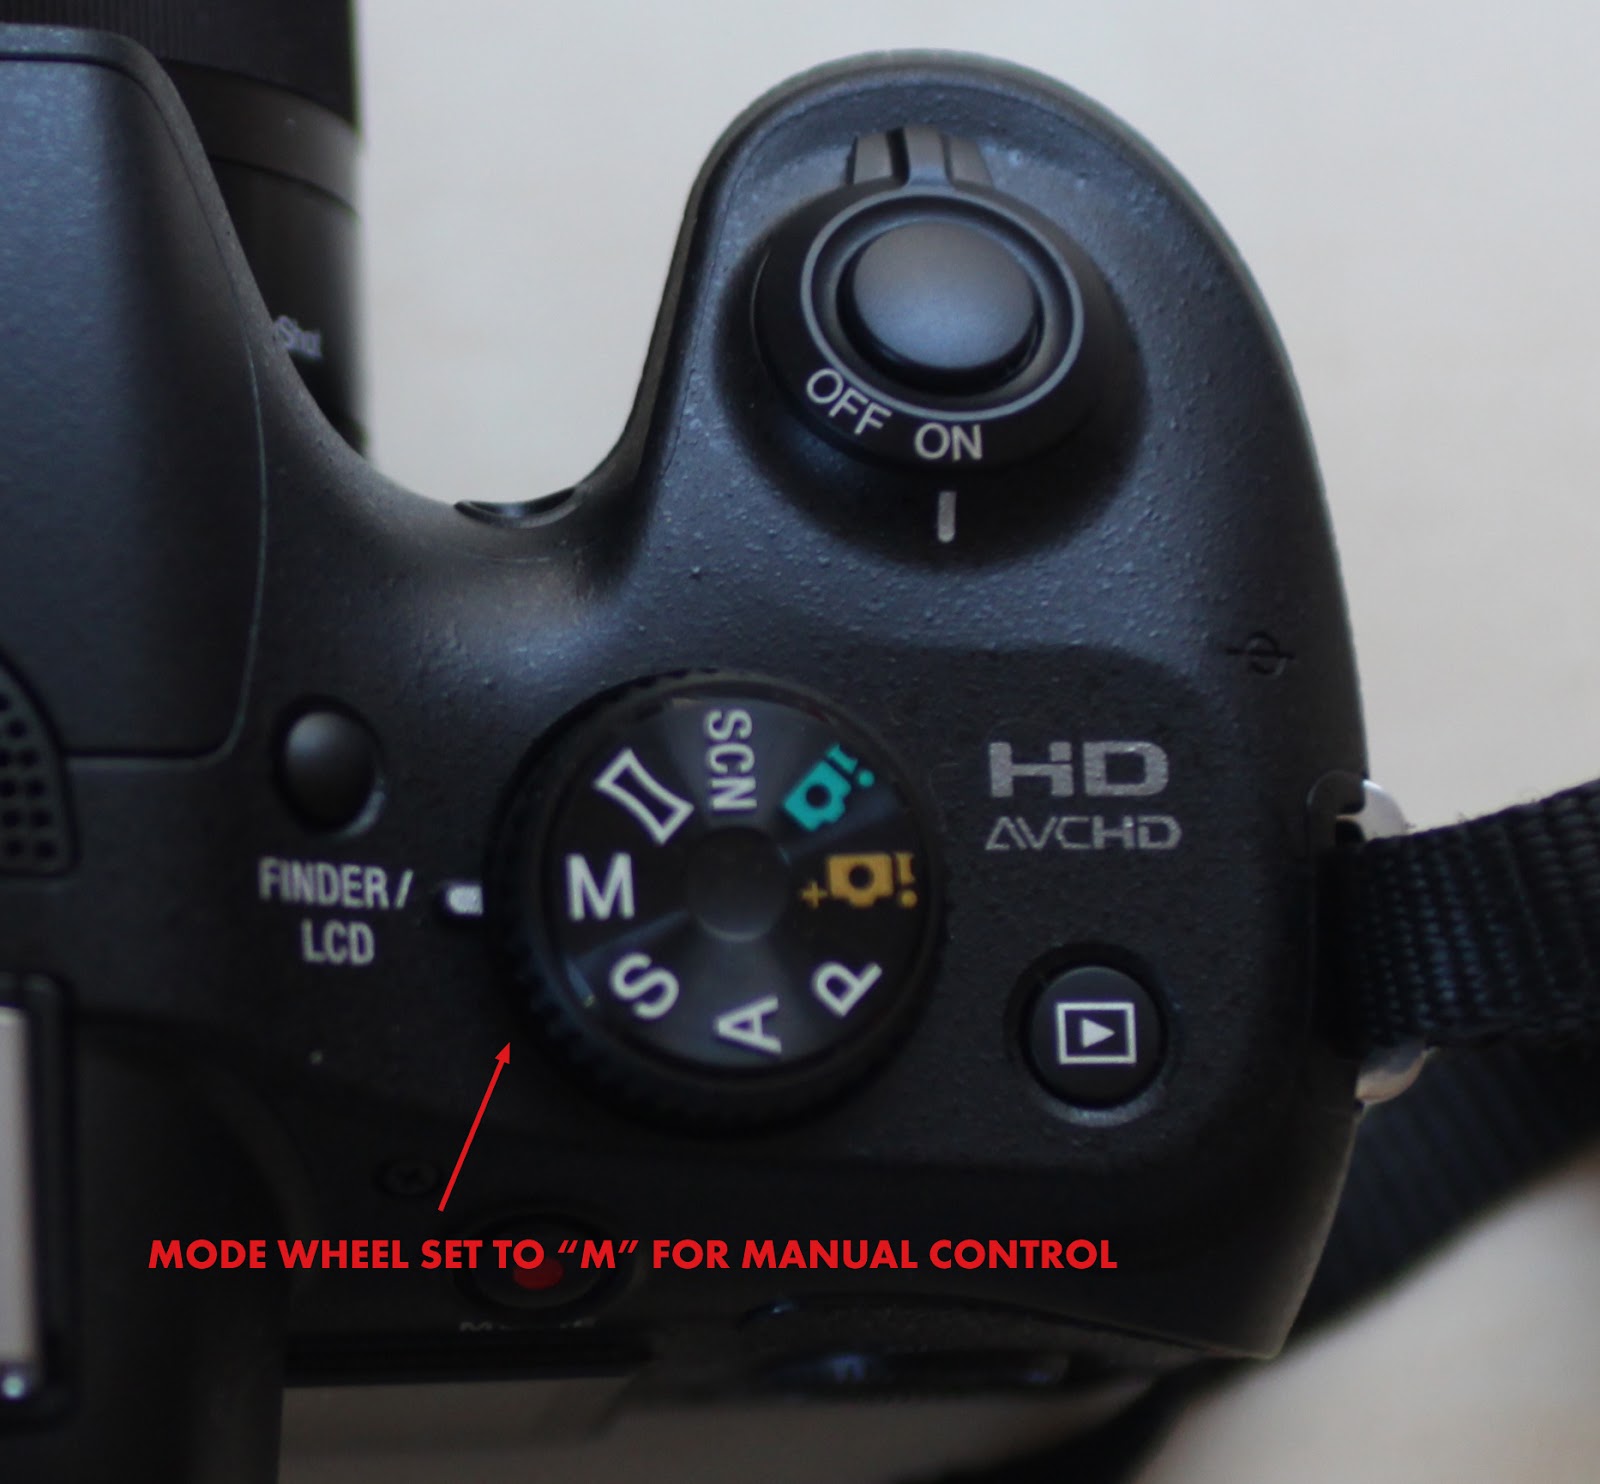
Setting the camera to Manual (M on the dial on the top right) allows you to control both aperture (f stop) and shutter speed. Both are controlled by first clicking the control wheel on the bottom edge and then spinning it. Pushing the wheel toggles the two controls, showing you the one you have control over in yellow.
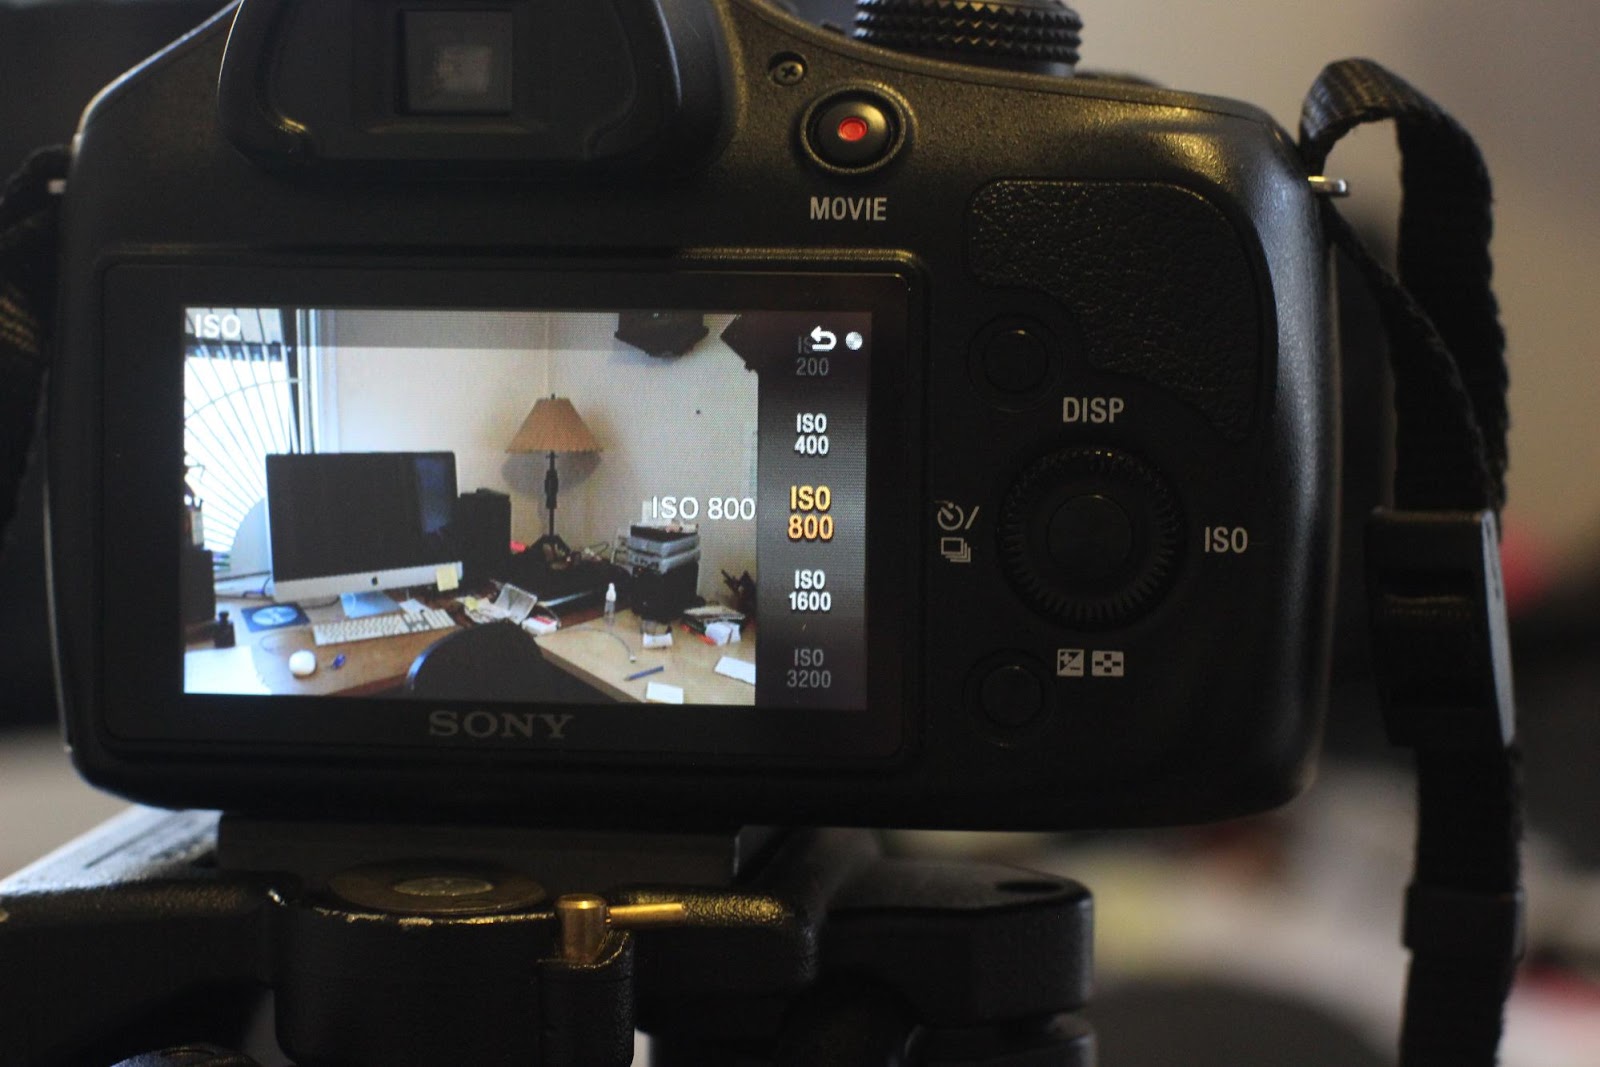
You also have control over the ISO, the measure of the camera's sensitivity to light, clicking the control dial on the right side, and then spinning the dial.
A good place to start is to set the ASA fairly low. This could be ISO 100 outdoors, and ISO 400 or 800 indoors. Then set the shutter speed to 1/60th, which is standard. After that, you can play with the f stop, going from f5.6 to f8, to f11, and f16.
In practice, it may be necessary to vary the shutter speed a lot, going as high as 1/250 of a second when working outdoors.
The camera has a “steady shot” compensation for camera shake, which should probably be left in place for video recording.
MOVIE RECORD
The movie button acts pretty independently of the other controls. You can use the shutter button for focus, and then hit the movie button. It records AVCHD .mov files in full HD 1920 x1080 format. These need to be transcoded to work with Final Cut Express. The audio is for reference only, and is recorded at 48kHz. There is no mic input. For consistency I recommend that we use the 60i (17M) setting “FH”. See “Image Size” in the menu.
No comments:
Post a Comment
Note: Only a member of this blog may post a comment.